Tuesday, March 20, 2012

Kids Art: Spring Chicks Collage

kids craft spring chicks collage

Feeling the irresistible urge to commemorate Spring Equinox in some way, I wanted to share this simple collage that kids and I made with our favorite textured papers, and a few other readily available materials at home. Arts/Crafts supplies are usually handy at home, all on low shelves for kids to reach and use at will.

What with being hit by a few storms back to back, and little snow flurries even though Spring is around the corner, I was looking to do something to lift our spirits, and this collage just suggested itself one wonderful night. (Boy am I glad I have the "Ideas Book" by the bed to jot down such things.)

Oggie made the background paper using his current favorite technique: Watercolor Plastic Wrap. I restricted the colors to the ones seen in the picture to keep the theme of Spring. Just mixed the 2 colors rather dilute and told him to do one color at a time, blue for the sky and blue+yellow for the grass/ground.

Ana helped with the Pom-Pom Chicks: Simply cut open a fat/large pom-pom so it has a flat side that makes it easier to glue it on the paper; plus gives a fluffy new baby chick look. Add eyes and beak and it is too cute to let go.

I did the eggs just for fun: card stock paper with designs using markers. Used a small piece of accordion-folded paper to 'pop-up' the eggs so it looks like the chicks are just hatching.

We were going to add on some strips of finely shredded tissue paper and yarn and maybe twigs from the garden to make a nest where the chicks are hatching, but, this looked simple and bright enough that we left it there.

I had a spare mat that I used to frame this work - it turned out rather cute according to the kids. I agree :)

Labels: , , ,

Wednesday, February 22, 2012

Kids Art: Net-Painted Pond Fish Cut Paper Collage

kids art net painted pond fish cut paper collage

On and off we love to make textured papers in various colors - a great way to use up paints doled out for that session, as well as to explore various materials to create textures.

Once the painted textured papers are dry, they get sorted by color and put into the "Specialty Papers" cubby.

Many fun projects have come out of sifting through the specialty papers we've collected over time and finding new ways to use them. Most often they end up as cut-paper collages or Valentine hearts or greeting cards, something special.

One of the techniques we learnt from Irene Luxbacher's Jumbo Book of Art is to do "Net Painting" to create the scaled texture of fish.

kids art net painted pond fish cut-paper collage


Items Used:
A net bag such as the ones onions or fruits come in
acrylic paints (or tempera)
rag cloth pieces
cardstock (or other heavyweight) paper
rubberband or string or yarn to tie the net bag
  1. Stuff a few pieces of rag cloth in the net bag and tie it closed.
  2. Dole out some acrylic paints on a plate, dip the net bag filled with cloth, dab onto the cardstock paper.
  3. Experiment first with how much pressure to apply, and how much paint to pick up to create the desired texture; try a combination of colors; add acrylic medium if the paints are too thick, or dilute a bit with water.
  4. Allow to dry and cut out fish shape for the collage

Textured Papers Used for this Net-Painted Pond Fish Collage:

1. Background is Watercolor Plastic Wrap paper
2. Pond vegetation is Salt Sprinkled paper and Watercolor Plastic wrap paper
3. Fish is from Net-Painted paper

Oggie helped make the background and pond vegetation papers.

Ana helped with net painting and cutting out the pond plants and fish.

I added the details to the fish using chalk pastels and composed the collage.

Both the kids helped "glue" the pieces with the double-sided tape for added dimension.

Labels: , , , ,

Wednesday, February 15, 2012

Kids Crafts: Painted Textured Paper Hearts


Whereas it appears that we have been doing a lot of arts and crafts with planned precision and focused execution, unfortunately it is not so... things just sort of happen and we go with the flow. It's mostly organic...

Every once in a while, I do like to try something new with the kids; so I try to gauge their interest and look for that window of opportunity to do it with them. Sometimes it turns out extremely satisfying, at other times it becomes a valuable learning experience.

I know I mention this often: Usborne Book of Art Ideas is one of my favorites for inspirational ideas to try with the kids on and off. Of course, I am always scouting for ideas, scouring the web, silently thanking the wonderful people who freely share their talents thereby allowing me to get away with minimal effort.

Handy as it is on the kids' bookshelf, many a weekend afternoon or weekday evening, left to her own devices, I've noticed Ana reaching for this book (among others) and flipping through the pages lazily until the amorphous idea in her head solidifies and spurs her into action.

One of the favorites from Usborne Books of Art Ideas is to make Textured (Painted) Paper, which we then use for collages and such. There are a few suggested techniques and plenty of room left open to come up with our own.

A couple of years ago, we used quite a few of the gorgeous papers from various art sessions for heart cards. Ana was inspired to do the same this year, digging through the cubby where we save the works we liked. She chose papers that were made with 6 different techniques.

1. Natural Sea Sponge and Tempera Paints: Simply dab the paper with the sponge and let it create the patterns and textures on the paper

2. Scouring Sponge and Tempera Paints: Drop small dollops of paint of different colors across the top of the paper and drag the scouring sponge down or across or in any direction, lifting and continuing till the paper is covered with paint. Coarse nylon scouring pads work well, makes strong lines like large brush strokes.


3. "Rain Painting" with Watercolor crayons or Watercolor pencils:  On heavyweight watercolor paper, just scratch on some colors using watercolor crayons or watercolor pencils; then leave the paper out in the rain. Let the rain drops wash the paper with interesting patterns. If left out in heavy rains, the paper will get soggy and fall apart, so, watch closely; use a brush and smear the water a bit to spread out the colors, if preferred. Allow to dry.


4. Salt-sprinkled Painting: As shared here


5. Watercolor Plastic Wrap: As done before Rather than the dark blues and greens that Oggie chose for his work, Ana chose to mix a pleasant lilac and powder blue.


6. Oil Pastel Resist: As in this post


Punch a hole; add a flower or a goody; write a message on the back; and a thoughtful, hand-made token of friendship is ready to give out to friends.

Oggie chose to give melted recycled crayon for his friends, along with the Watercolor Plastic Wrap cards he made for them. Same procedure as I've done before with Ana, except this time we used snowman moulds. Wrap one up in a piece of tissue paper, attach a heart card, and a special memento is ready for a friend. Who can refuse crayons? Especially multicolored ones?


Labels: , , , , ,

Tuesday, February 14, 2012

Kids Art: Watercolors Valentine Hearts


Watercolor Cling wrap is a favorite project in our house - Ana and I do it on and off, for fun. Oggie is just now getting into it.

Rubber Cement masking is another fun project we enjoy.

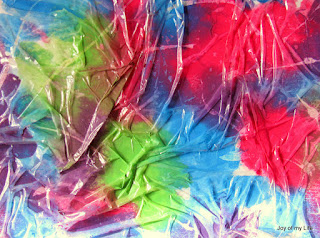
Here, we combined rubber cement masking and waterclor cling/plastic wrap ideas to make sheets of colorful paper which we then cut into heart shape valentine cards.

The hardest part of this project is the wait: waiting for the rubber cement to dry and waiting for the watercolor to dry so the plastic sheet can be peeled off. We did these steps at night so we can set it for drying overnight which worked out well.

And we did the project about a fortnight ago - started out as just another Weekend Art Morning with Mama and then ended up as a Valentine Heart Cards Project.

Oggie enthusiastically did all the steps right from mixing the colors, to testing if it is finally dry so as to cut out the hearts.

If an eyebrow inadvertently raises on the heavy use of blues and greens rather than pinks and purples in this project, it is by Oggie's design, uninfluenced. No, no, nothing about 'boy' colors or 'girl' colors, no such stereotypes is encouraged... just that ever since he could communicate in his own way, he has been strongly attracted to blue, despite being offered other color choices.

And as of yesterday's tally, Og's first favorite color is blue, second is red, third is green, fourth is yellow... eightieth is grey, ..., hundredth favorite color is pink.

Heavyweight paper works best as it doesn't buckle much and holds paints well. Since cling wrap is tricky for small hands, I use just a regular plastic grocery bag. Save and reuse the plastic bag for art work of course, especially (and thankfully) since local grocery stores are not allowed to use plastic bags to bag the purchases for the customers.

I am digressing... back to the project.

Items Used:
  • heavyweight paper - I use the 9"x12" watercolor paper (90 lb) or acrylic paper (110 lb)
  • diluted tempera paint in various colors, or watercolors 
  • large paint brushes (preferably one for each color to keep the colors from getting muddy)
  • a plastic grocery bag cut open to form a flat-ish sheet large enough to cover the 9"x12" paper
  • optional: heart-shaped cookie cutter, pencil, scissors

Note: If using rubber cement masking, allow plenty of time for drying. Apply the rubber cement, allow to dry completely. Don't peel off  the rubber cement. Use this paper with the dry rubber cement on for the watercolor cling/plastic wrap project as below.


  1. Get the paints ready: mix the colors as needed, dilute with water to a buttermilk-like consistency; preferably use a separate brush for each color; I limit the colors to 3 or 4 at a time for the 3 year old so as not to get it all muddy


  2.  Pick up one color at a time and make blobs/blotches on the paper;  Cut the 9"x12" paper to any size, if preferred; for the first trial with Og, I cut a 6"x6" square so a large canvas does not overwhelm him; try not to mix the colors on the paper, keep the color blobs separate
  3. Lay the plastic sheet on the still-wet paint and scrunch it up with the hands while pushing down on the heavyweight paper; the idea is to get the plastic bag to stick on, spread the paint blobs a bit, and also form patterns that will look stunning when dry :)

    Watercolors fractals Valentine Hearts

  4. Allow to dry undisturbed; we usually set it by the heating vent in winters and within an hour it is dry
  5. Peel off the plastic sheet when dry; test a corner first to see if it is ready to peel.  then, remove the dry rubber cement mask to reveal the preserved whites (or layered colors) of the paper. Et violà!

    Watercolors Valentine Hearts


Labels: , , , ,

Friday, January 08, 2010

Kids Art: Watercolor and Cling Wrap

watercolors and saran cling  wrap

Continuing the theme of art projects we did recently, here is another.

I was browsing for simple activities with stunning results that can be easily done at home during the Winter Holidays and came across this. I had to try it with Ana.

Items Used: Watercolor paper, Acrylic paper, diluted tempera paints or watercolors, large paint brush, and plastic cling wrap.

kids art watercolor and cling wrap

  1. Simply apply blobs of color on heavy-weight paper.
  2. Place a Cling Wrap sheet on top while still wet, and crinkle it to form patterns.
  3. Allow to dry.
  4. Remove the cling wrap.
  5. Voilà!

We left it by the heating vent, of course, to speed up drying. And proudly showed it to Appa when he got home!

Heavy-weight paper works best, and, the nature and quality of the paper makes a difference, as we would expect. Acrylic paper had a more smooth finish with fractal-like formations.

Watercolor and Cling Wrap

Whereas, Watercolor paper had a coarse textured look with an interesting cracked crystalline pattern.


Usually, I talk about interesting things we could try with materials at home to gauge Ana's interest on any particular day.

Ana has been exploring a lot of open-ended art activities since babyhood and has shown signs of being more than ready to do something definite, with a purpose, but which is also new with room to explore. Knowing her materials and having some expectations helps her take the first step in a new direction.

When she expresses readiness to try out, I assemble the materials, describing them, repeating the names of materials that are new to her.

And, as usual, she wasn't satisfied with making just one, so she created a few, playing with colors and textures, some of which weren't as stunning as the others as we found out. But then, 'stunning' is quite subjective anyway :)


Labels: , , , ,

‹Older