Sunday, January 17, 2016

Valentine's Day Cards So Far


Thanks to schools adopting the day as "Friendship Day", the older child has always looked forward to Valentine's Day preschool through lower elementary. The younger one, not so much. He could take it or leave it. But, what they both like is an opportunity to create something fun and share with friends.

As the kids started thinking about what sort of card they want to make for their friends this Valentine's Day, we started to casually look back at the ones we have done so far. We were quite happy to visit the memory of how they arrived at the design and how they executed it and how incredibly satisfying it was to them.

While the cards we've made over the years may not all look polished and stylish and sophisticated, the emphasis at home has always been on being creative and enjoying the process without much weight on the end-product's superlative finish and appeal. After all, what is slightly unappealing to my eye could be dazzling in theirs.

The arts and craft supplies are on low-level shelves and cubbies, organized in a way to help them find things and make sure they are returned to the right spot for next use. They each have their own space to create, which is a luxury as I keep reminding them way too often.

Anyway, the younger child's favorites were Prehistoric Splotch Creatures, Shaving Cream Marbling, and Lettuce Stamping.


valentine cards kids craft easy ideas handmade


The older kid preferred the more crafty Valentine gifts like her Salt Dough Heart-In-A-Box and Kisses Mice Envelope Card.


valentine cards kids craft easy ideas handmade


The Hanging Decorations she made a while back are still cherished in our house: Striped Hearts and Plump Hearts.


valentine cards kids craft easy ideas handmade


Of late, the older child has played with PicMonkey to create some custom graphic cards. One of my favorites that I made for the kids using picmonkey is the Valentine Coupons.

Boy were they thrilled to see a coupon that said "One single serve dessert you pick at the bakery"... and another that said "Stay Up Late Till 10 p.m."  Quite a dilemma for the kids to "Save" the coupon for a special day or just go out and splurge and get that dessert eaten right away! 

Of course, being the artful mommy, the coupons came with the restriction: Not Valid on School Days, Limit One Coupon Per Day.


valentine cards kids craft easy ideas handmade


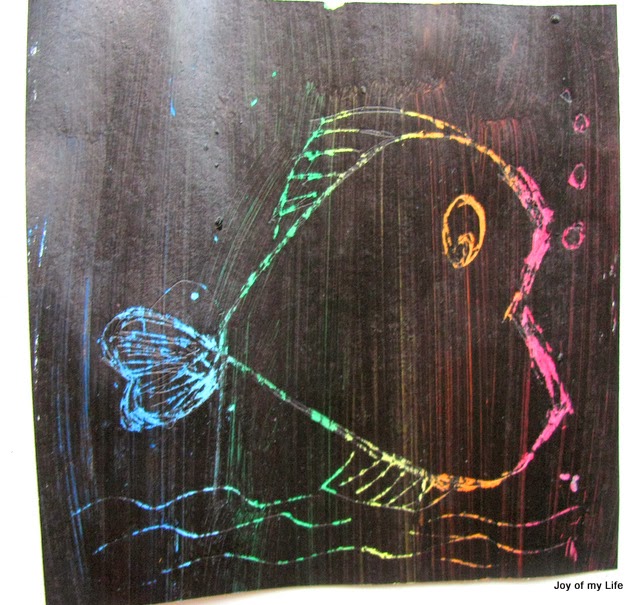
Some art exploration that became Valentine's cards include Watercolor Cling Wrap, Textured Paper Hearts, Oil Pastel Masked hearts, Reverse Stamped Hearts, DIY-Scratch-It Cards.


valentine cards kids craft easy ideas handmade


My favorite in terms of the idea is the younger child's "Flags Valentine" cards, and crosswords. He picked out some interesting flags of countries and designed a simple card with a One-line Joke for each. I like that he tried to match up his friend's roots with the right country flag where possible to personalize the cards.


valentine cards kids craft easy ideas handmade


The older child is not quite gung-ho about Valentine cards and that's okay. No obligation, no pressure. If it seems like fun and she wants to do it, then it's a lot of fun for me to join in. She is still convinced that it has to be something unique that she has made, not store-bought.

For now, the younger child is strongly leaning towards his current obsession and trying to come up with something he thinks is fun to create... We'll see how it shapes up over the next two weeks.

Labels: , , , , ,

Sunday, November 23, 2014

Kids Craft: Potato Stamp Turkey Card


It was a damp and grey weekend, nothing unusual for these parts, especially around this time of the year. We spent the morning cleaning up the house a bit. Then, hosted a play date for a few hours.

After an hour or so of play, 2 out of the 4 kids were interested in making Thanksgiving cards. And that's how these Potato Stamp Turkeys came about.

I carved the tear drop-ish tail feather shape into one half of the potato; and the pear-ish body for the turkey in the other half. A few colorful stamp inks, a black pen, and card stock paper is all we needed to make these adorable cards.


potato stamp paper craft turkey thanksgiving card kids


The six year old enjoyed the Potato Stamped Turkey and then went on to trace his hand and make a turkey out of it; then went on to add a barn, a farmer, some clouds (one shaped like angler fish!) and other details. "The giant turkey is closer to us, everything else is far away and that's why they are smaller than the turkey," according to the kid.


The older child helped make these adorable turkeys from colorful printed papers. Also, she drew a tiny turkey in a circle-cut paper, which was perfect for making an elegantly simple card. Only, she made it a cross between turkey and chicken, just for the fun of it. We did add "Gobble, Gobble" using letter stamps.


To tickle the funny bone, I printed out the poem, Gobble Gobble, from Kenn Nesbitt's The Biggest Burp Ever. The kids glued it on in their cards so their friends will get a chuckle when they read it.

After all that fun/hard work, it seemed like the perfect time for popcorn, hot chocolate, and a movie. 

Labels: , , , ,

Sunday, April 13, 2014

Easy-to-Do Eco-friendly Party Favors


The newly minted 6 year old wanted to get together with his friends and have a special group play-date to celebrate his birthday.

Right from picking the venue from the 3 choices we gave him to checking the RSVPs; from listing possible things to make for the party favors to actually making them, the kid was fully involved. I like it that he can make up his mind quickly and stick with it. I wasn't that sure about anything when I was six.

Hand-made things are much-valued in our house. The 8 year old doesn't feel happy to wrap up a birthday present for her friends unless she has at least one small hand-made thing that she has put some thought into and the time and effort to make it. The 6 year old has been the same way since that first set of Holiday Cards he made for his friends when he was not yet 3.

Making the party favors was the highlight for the kid during the previous weekend. He wanted to include 6 items in the goody bag as he is six. Much like five items when he turned five  and 4 items when he turned four. He did agree that he will break this trend when he turns 7 and come up with something new.

Being partial to eco-friendly re-usable things, it wasn't hard to assemble the items for the party favors. Especially when the kids were keen on doing most of the work.


1. Rainbow I Spy Jar: Much like the I-Spy Jar he made for himself when he was little. Assembly-line precision is his game. I re-purposed a few used  plastic drink bottles from the reycling bin.


From choosing the food colors to use, to mixing the color in the rice to make the filling for the jar; from selecting things to put in the I Spy jar, to laying out containers with the chosen items for assembly; from scooping and pouring the colored rice through the cone-funnel  in rainbow order, to tucking in a few extras in each jar so there's the surprise element, the kid was completely in-charge of this item, and loving it.


I simply printed out labels to go with the jars with a short list of items to spy and attached it to the jar. So, it wasn't much work for me at all.


2. Six Stories CD: After the usual bedtime reading, most nights he also listens to music or stories-on-tape in bed. So, he wanted to make a CD of stories for his friends.


Initially, he wanted to make up his own stories and have me record it. But, knowing how wild and long and convoluted his original stories can get, I steered him towards just reading his current favorite books.

But that proved difficult as he has a zillion favorites, most of which were non-fiction. So, to make things easier, I suggested that he choose six fiction picture books, short and fun and rhyming.

That proved just as hard as well. So, I offered to choose 3 from our bookshelf for him, while he could choose 3 from the current batch of picture books we had checked out from the library.

This worked out well. We finally had six fun stories he read aloud which I recorded and burned a CD.


I made the CD labels. The kid helped make the CD "cases". We had a bunch of Marble Papers from various times that we do it at home. Shaving Cream Marbling is one of the staple favorites at home: after the first few beautiful prints, the kids love the sensory experience of just playing with the shaving foam and making a mess, which is fine.


3. Polka Dot Sidewalk Chalk: Both the kids love sidewalk chalk and they love drawing either on the easel blackboard or the sidewalk. They are always on the lookout for fun chalks. When we came across these polka dot ones at Michael's it was settled. These were the chalks his friends would love to have.


4. Wood Stamps: If there is one thing that I can't easily walk away from, it is wood stamps. I love the variety, I love their versatility, I love the potential they present... and looks like some of this has rubbed off on the 6 year old.

Rather than just some random design, the kid zoomed in on the alphabet set of stamps.


When he was still working on his writing skills but had so much to write down, he found the alphabet stamps at home very handy. Simply pick out the letters that made the sound he wanted, and stamp it on the paper. Lo and behold! He has written.

I still treasure the "i luv mumu" card he made for me at 4 - his first card with those words - stamped on.

I did pick out some design stamps for the siblings of his friends who were joining us for the party, I couldn't resist.


5. Seed Paper: We called it "Friendship Paper: Plant it and watch it bloom!" On and off we make hand-made paper at home.  Add a little seeds to it and we have seed paper, ready to plant. It looks like we default to seed paper for both kids' birthday as it is in Spring and 'tis the season to plant.


The kid helped tear up the unwanted papers and soak them in water to make the pulp. Then, scooped some pulp into my mesh frame to make the paper. We let it dry by the vent. Then, cut the seed paper into heart shapes and attach a label and it is good to go.


6: Friendship Book: At first, the kid wanted to write a book. But, I talked him out of it as his books tend to be too elaborate. Then, we talked about how fun it would be to make your own book! So, we decided to make a sort of acrostic poem-ish activity book that his friends get to fill out and customize as they like.


Along with the alphabet stamp, this would be a fun activity for the recipients, hoped the kid. I printed the pages and used a paper-fastener to hold the pages together. For some reason, the kid prefers brads to stapler... and I think it might have something to do with the ease of adding more pages to his existing book...


7. Fabric Goody Bag: Last but not the least, he wanted a reusable fabric bag for holding all these lovely goodies. I sewed them quickly. His sister helped add the cinching ties.


The kid wanted to personalize each bag. So he stamped a rainbow fish. Used his alphabet stamps with fabric ink and stamped the names for each of his guests. And the sibling's name if they had any.


Plus, knowing how much both my kids love to label their things, I printed a few custom-design name labels for the friends and tucked it into their goody bags. The 8 year old girl loved making the flags using the printed label, chopsticks, and some Scotch™ tape, to go in each bag.


All in all, a fun day with friends, with parents catching up and getting to know each other better while the kids filled the space with their collective energy and warmth.

Labels: , , , , ,

Tuesday, February 11, 2014

Kids Art: Potato Stamp Crosshatch Hearts


Inspired by Lines Across: DIY Crosshatch Stamp, we decided to try some crosshatching at home.

First obvious was to use the corrugated cardboard we had handy.


Then, rather than foam strips on wooden block to make the elegant crosshatch as in the link, I decided to get to work on a potato with my X-Acto knife. Couldn't get thin and uniform lines cut out on the potato, but it turned out all right for our exploration at home.


We tried two ways:
1. Use a stencil of a paper heart cut out with negative space. Stamp with the crosshatch potato stamp all over to get the crosshatch heart.

2. Stamp on a piece of card stock with the cross hatch potato stamp. Then cut out heart shapes from it.

While not as elegant and pretty as the inspiration, kids got an idea of getting horizontal, vertical, and crisscrossing lines via simple stamping.


Labels: , , ,

Monday, February 10, 2014

Kids Craft: Reverse Stamped Hearts

kids valentine craft Reverse Stamped Hearts chalk pastel


Masking is always fun. Crayon or Oil pastel resist, rubber cement masking, masking tape... so many ways to preserve the area from other influences on a work in progress.

Any shape template can be used, of course. But, keeping Valentine's day in mind, we went with the heart template.

Instead of stamping, kids can use tempera paint, or chalk pastels, to add color to the card while the heart shape mask is applied.

  1. Cut out heart templates of different sizes
  2. Cut out card stock in desired size for the final card
  3. Choose any favorite cute stamp and ink, or make your own potato stamp or vegetable stamp
  4. Place the heart template(s) on the card stock - to make sure it doesn't move around, I used a piece of masking tape doubled on itself to act as double-sided tape. masking tape is easy to remove without damaging the paper later.
  5. Stamp all over, letting the heart templates act as the mask
The 5 yo preferred using the small square stamp ink pad to fill the page with blocks of color for one of the cards. I liked the flower stamped with orange ink, with added yellow chalk pastel.

Another interesting method for masked hearts is to use chalk pastel:

kids valentine craft Reverse Stamped Hearts chalk pastel

  1. Simply add color to the edge of the heart paper template. 
  2. Place this color-edged paper on the card to be made. 
  3. Use a tissue or brush to gently diffuse/disperse the chalk pastel color onto the card

Of course, once we bring out the chalk pastels, we can't put it away quickly. So, we did some simple book marks with heart stencils and templates cut out from paper. I sprayed a sealant when we were done, to preserve the chalk pastel work and not have the chalk rub off on all that it touches.


Labels: , , ,

Sunday, February 09, 2014

Kids Craft: Hand-made Paper Hearts on Marbled Background

Hand-made Paper Hearts on Marbled Background


On and off we make hand-made paper at home. Seed paper is particularly popular around Spring time.


Marbling is another favorite activity with the kids. So, we have a lot of marbled papers handy. The 5 year old prefers the simple joy of Shaving Cream Marbling. Sometimes he uses too many colors which get muddled up, but it's always fun.


This easy card can be adapted for any occasion. Since Valentine's day is just around the corner, we decided to go with hand-made paper hearts on marbled background. I can easily see clover leaves instead of hearts for St.Patrick's Day, for instance.

Items Used
Hand made paper in various colors
Marbled paper in suitable contrasting colors
Double-sided foam tape
Fancy wiggly eyes, sequins, beads, ribbons for embellishment, if preferred
glue appropriate for adhering the embellishments

  1. Cut out cute hearts of various sizes from the handmade paper
  2. Mount them on marbled paper cut to size
  3. Decorate with pressed flowers, ribbons, yarn, sequins, glitter, if preferred 

Labels: , , , ,

Saturday, February 08, 2014

Kids Craft: Colorful Striped Hearts Card Hanging Decoration

Colorful Striped Hearts Card Kids Valentine Hanging Decoration


This can be a nice and simple Valentine card or a stylish hanging decoration. We went with hanging decoration.

Items Used
Card stock paper in one or two different colors
copy paper or construction paper of various colors cut into strips
glue
scissors
heart-shaped template
X-acto knife and self-healing cutting mat as needed

  1. Cut out square pieces from card stock paper the size of the finished card needed and cut out heart shape "window" from each of the square card stock pieces 
Kids Valentine Craft Colorful Striped Hearts Card Hanging Decoration


2. Apply glue to the outer edge of the heart window on one card stock and glue the strips of colorful paper


Kids Valentine Craft Colorful Striped Hearts Card Hanging Decoration


3. Then glue on another square card stock with heart window to sandwich the colorful strips of paper. Rather than just arranging them as strips, the 8 yo decided to do paper weaving on one of them.

Kids Valentine Craft Colorful Striped Hearts Card Hanging Decoration


Punch holes at the appropriate corners to attach these squares together with yarn. Add some beads for tassels.

Kids Valentine Craft Colorful Striped Hearts Card Hanging Decoration
Voilá! A sweet little Valentine card or hanging decoration is ready.


Labels: , ,

Friday, February 07, 2014

Kids Crafts: Make Your Own Scratch Heart Valentines

Make Your Own Scratch Heart Valentines


Scratch art was popular for a while at home when I had bought some kits from the store that came with a stylus and some stencils for creating colorful pictures on black papers: simply scratch out the black of the paper to reveal the colors underneath.

And then I came across this lovely post about DIY Scratch Book. Scratch fever took hold and we ended up doing some cards for this Valentine season.

Items Used:
Thick card stock paper (or glossy photo paper or even old photo prints)
brightly colored oil pastels
black tempera paint (we used a mix of metallic dark brown and black)
paint brush
stylus - toothpick or an old ballpoint pen that doesn't write anymore (we used small screwdrivers - flat and crosshead)


1. Use the oil pastels to add bright rich colors to the card stock paper. We used a long strip so we can cut it to size later.

Make Your Own Scratch Heart Valentines


2. Dilute the black tempera paint with a tiny bit of water and paint over this colored paper. Allow to dry completely. We started this project after dinner one evening and left the painted card stock by the vent overnight to dry. Of course, any dark color paint would work, but black makes the colors pop. I've tried white and light blue oil pastels underneath a dark blue painted layer and it looked fantastic for winter scene.


Make Your Own Scratch Heart Valentines


3. Then use the stylus to scratch out the paint in any pattern or design to reveal the colors underneath. The fun part for us was using just the various size heart cookie-cutters to create the designs we liked.

Make Your Own Scratch Heart Valentines


Each kid got to do one per guideline from me and one on their own. Of course, the guided ones are not as interesting as the ones they came up with.

Make Your Own Scratch Heart Valentines


Ana made this Heart Girl.

Make Your Own Scratch Heart Valentines


Og made this Heart Fish. Rather, he traced the hearts to a generic fish shape and asked me to add the finer touches needed to make it look more fish-like.

Make Your Own Scratch Heart Valentines


All in all, a fun activity which can be adapted to any holiday. 

Labels: , ,

Monday, December 02, 2013

Random Hand-made Things

While the 8-year old hasn't really cared much for the run-of-the-mill pom-pom and paper plate kind of crafts so far, she still cares to create and craft with her own hands as and when inspiration hits.

Of late, inspiration hasn't hit much in the traditional way... or rather, it probably hits at all the wrong times when she'd much rather be riding her bike or reading a book... plus she is a lazy crafter, like her Mama. Stars have to align and universes brought to order before all the teeming ideas in the head ever materialize into a tangible outcome.

Though not much for drawing or painting these days except a rare doodle or two, every once in a while there is something that she puts under my nose with a, "Here, Mama, for you." I can't bring myself to toss these into the recycling pile. Like this picture of her zapatos, for instance.


She seems to love paper crafts of all kinds. At least for now. That can change anytime. She still loves Origami-- the sole paper-crane-maker at home. Stamping and card-making is a favorite activity as well-- especially after binge-watching youtube videos of 25 Days of Christmas Cards. We have a ton of cards we don't quite know who to send to as they are all one-of-a-kind sort-of-experimental ones... maybe we have to set up her own Etsy store or something.


And fabric crafts is another favorite. Making her trademark purses for her friends' birthdays has become a must these days. From choosing the wool felt for the purse and matching yarn for the strap to the decorative beads to sew the purse together she puts in some thought and heart into making them.


hand-made wool felt purse


Making footwear--She found two good scraps of wood, traced her foot shape on each, and got Papa to cut it for her and staple the fabric on to make a pair of unique wooden footwear. Not terribly comfortable to take a leisurely stroll in, but more for a clunky meditative ambling...


Designing clothes-- of course, the Fashion Design Sketch Portfolio Kit that her aunt gave last year was a great hit with the kiddo even if Mama was squirming and frowning at the models. The (Fashion Angels™) Kit comes with stencils for clothes and accessories, plus a sketchbook full of outrageously unrealistic models to draw on.

Of course, the stencils can be quite limiting, and perhaps best used as a guideline for lines and flow and fall of fabrics when designing...

But, she had a lot of fun adding her own whimsical touches to it, completely oblivious to the disproportionate figures.

My favorite is this design she calls "Fancy Blues"-- love the little details of the accessories in the hair, the blue around the eyes, and the fact that since no single stencil has that exact long dress she improvised by shifting the short skirt stencil down a little each time to add the frilly layers at the bottom of the dress... plus the little pattern on the fabric to indicate fish-scale-like shimmer... Wish I could sew her designs!

And, it is interesting that she chose strong pencil lines for the face coloring and freckles. As she clarified, the yellow hair is a wig.

Sewing: for now, she is just getting her feet wet on my sewing machine. Pillowcases are a breeze of course. So, for practise, being the ever-tough instructor that I am, I gave her a piece of fabric with "Og" written with a marker and asked her to sew on the marked lines. She did it fine enough for her first attempt, turning the fabric as she went, stopping and adjusting as needed. It just takes practise...


And then we had to step it up a bit: she designed a skirt for Enid and sewed it using the machine for the most part, except for the waistband which, being so small, can get tricky, and therefore best done by hand.


Labels: , , , , ,

‹Older