Wednesday, December 17, 2014

Kids Craft: Paste Batik Place Mat


The 9 year old wanted to give a handmade present for one of her friends. Since her little brother was making a paste batik flag anyway, and we had enough flour paste ready to go, she settled on a paste batik place mat for her friend. Rather than an arbitrary design, she wanted to personalize it with her friend's name.


Same procedure for paste batik as always, using unbleached muslin. Once the paste letters were dry, she added the colors using acrylic paints.


When paint was completely dry, she removed the dried paste to reveal the masked areas the whites of the fabric. Then, ironed the reverse side to heat set. Then, washed and dried it. Then, ironed it out flat again. And, with a little bit of help from me in pinning the edges, the 9 year old sewed the place mat.


Labels: , , , ,

Monday, April 14, 2014

Kids Sewing: The Felt Purse

Or more accurately, "Evolution of the Felt Purse Over the Last 2 Years."


Starting with the simple felt purse which were hand-sewn at the sides with beads, no strap;


then, moving on to making the same hand-sewn purse with finger-knitted strap;


and then, making crocheted strap;


finally, sewing gusseted purse with lace strap and embellishments...


It has been quite a journey for the 8 yo. Many of them were made specially for her friends. 

Labels: , ,

Thursday, March 13, 2014

Kids Sewing: Easy Felt Gusseted Purse


We came across Crafty Bags for Stylish Girls by Elizabeth Ingrid Hauser at the library. While most of the purses there were not my style at all (possibly because I am not a "stylish girl"), the 8 yo liked it enough to borrow it and pore over it at home. Finally, she picked out the first purse she wanted to make from the book.

Felt fabric was recommended, but, the girl chose fleece, which is fine as this is just a fancy purse, not the hold-all that I pass off as my purse.

She was fascinated by the gussets on the sides for the purse described in the instructions. It frustrated her to read the instructions all the way through, having to go back and read the previous steps in various iterations. Finally she figured it out and was ready to sew.

Skipping the tedious details of making the purse (as it is available in the copyrighted book), we get to the fun part of embellishing to personalize it.

Raiding my stash of laces, rick racks, buttons and appliques, she chose the lace for the shoulder strap and beaded dragonfly applique for the embellishment.

Of course, the finish is a bit rough: while raw-edges on fleece are fine to leave unfinished, the ones on the cotton gussets aren't. But the girl did not want to pay attention to such details, especially when they are not easy to do. So what if the insides were a bit of a mess? She loves it and wears it around the house all the time - even when doing her cleaning jobs!

All in all a fun project, so much so that she has designed a couple more similar ones to make, with minor variations in size and colors and decorations.


Labels: , ,

Wednesday, March 12, 2014

Kids Sewing: Half-Apron

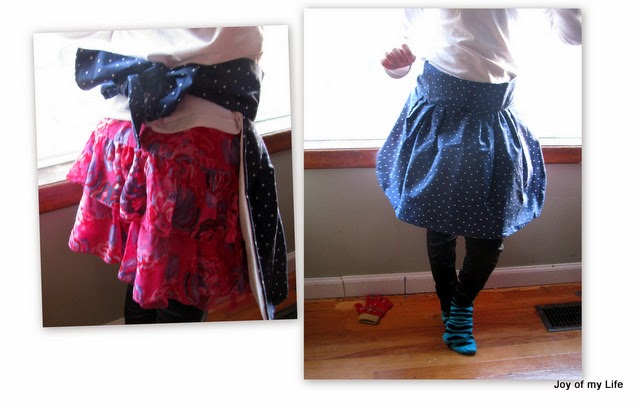
kids sewing half apron reversible

Every once in a while, the 8 yo gets into this phase where she can't do anything else until the art/craft/sewing project in her mind takes physical shape.

And, every once in a while, I get gung-ho about showing her a simple item to sew, whether it is in her radar or not. It helps if the item is for her friends or family - it acts as a powerful motivator, to be able to finish and give it away.

And that's how this half-apron came about.

Her friend's birthday was coming up - a friend who is herself a mini-seamstress. The trademark purses she makes for her friends' birthdays wouldn't work as she has already given a nice hand-made felt purse to this friend last year.

Half-apron seemed like a good idea.

kids sewing half apron reversible


I let her raid my fabric stash and choose some fabric. We decided to make it reversible, so, we had two different fabrics for the apron - polka dot on one side, plain white on the other.

Then, I measured her waist and the height for the apron. Since we needed gathers/pleats, we kept the full waist measurement. And then I got very generous with the measurements. And decided to make it large enough for a little girl and possibly her Mama.

Then had her cut the initial rectangle of  waist x height, out of both the fabrics. Plus cut out long strips for the waist-band-tie from both the fabrics.

With the fabric cut out and ready, and armed with a pincushion full of pins, I was ready to show her what to do.

Since this is not a sewing tutorial, let me skip the tedious details and get to the final part, which was to sew a hand-made tag that says, "Made by:__________ for_______".

kids sewing half apron reversible


Did she enjoy the process of making it? Yes.
Will she be able to do this again by herself? Probably.
Will the finish on the independent one be as smooth as this one which I oversaw zealously? Probably not.

The fun was to hear her friend, the recipient, say that she liked it, and that she was glad it was a half-apron as she had just sewn a full-apron for herself not too long ago.



Labels: , ,

‹Older