Kids Art: Print Making

We've been exploring Print Making on and off. Each session taught us something that helped us make the next one more rewarding.
Most traditional print making procedures I've read about involve some kind of water-based (block printing) ink, and possibly Brayering. Now brayering is something I am exploring on my own, as well as paper quilling. Nothing spectacular to show for it, but, it keeps me smiling...
Anyway, back to Print Making: We tried acrylic paints vs. tempera paints (no inks), using small paint roller to spread paints vs. just fingers, different types of paper for prints (white bond/copy paper, manila, easel paper), and different tools for drawing the design on the paints...
The informative introduction by one of the creators of KinderArt®, Andrea Mulder-Slater, was all I needed for motivation - the artists and their representative works she mentions are the inspiration for trying out a much simpler kinder version of this art with Ana.

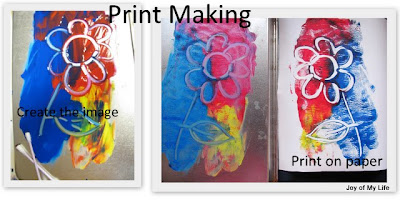
Items Used: Old baking pan, tempera paints, Q-tips, toothpicks, easel paper
- On the back of the pan, spread a small amount of tempera paints as thin as possible. This is the tricky part, and is probably better done with a small paintroller if preferred, but, fingers worked fine for us
- Use the Q-tip to draw the design/scene to be printed. As expected Q-tip makes thick bold lines, whereas toothpick makes thin delicate lines
- Roll a piece of easel paper gently over the top, smooth out with a flat lid, or just the side of the palm, till the print shows through, then gently roll the paper back out
- Voilà!
Being on a lean budget in these tough economic times, I tend to mimic D's grandma from the post-Depression days when it comes to non-essential things. In this context, it was a bit sad to note another of my favorite local art supply store going under. The store closing sale was a steal - it literally felt like stealing from under their noses when I restocked my shelf with the favorites with less than 20$.
I usually shop at this tiny little art supplies store in my neighborhood that has an annual Spring Sale and really treat it like Spring Cleaning/Yard Sale and put out items on the sidewalk outside the store at dirt cheap prices - that's where I turn to for the usual brushes, paints, mats, even frames and reprints.
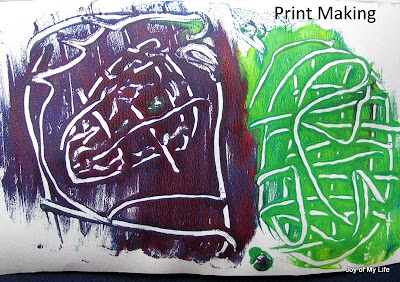
But, I am rambling... back to Print Making: We liked this method as it gave us consistently satisfactory impressions, with very few household items, and minimal frustration for Ana.
- We managed two prints at a time for some, before we had to replenish the paints, and draw the design again
- Multi-colored prints or monochromatic ones can be made, we liked the colorful
- Ana preferred Q-tip, while I liked toothpick for smaller designs
- As Ana noted, the image is laterally inverted or horizontally flipped, which is probably obvious to adults, but, is a great discovery for kids, especially when they try to write their name and other messages
- Easel paper and regular copy paper gave good results, we wanted to save our reserves of watercolor/acrylic/bristol paper for other legitimate uses
Ana's Arabic Calligraphy style design is my favorite so far to be stashed away, of course.

The Sun, Earth and Moon design is Appa's favorite as it was his birthday card.

Some smaller prints were interesting as we could cut them up and use in greeting cards later.

A neat activity to explore at its simplest form. Maybe down the road we can start adding complexity by using the traditional tools & techniques that artists prefer...
Labels: art-exploration, arts and crafts, print making


5 Comments:
I arrived here today via Bilbified - and what a treat to read about your printing - it's become one of our favourite activities (indeed my own blog post today has a picture of our latest family printing session!). It's so satisfying for the girls - the end results are somehow very substantial or "professional" looking.
Love your site! I am a Pre - K teacher & I found you when I entered butterfly and searched Google images! wow! what wonderful ideas!
Thanks! Jennifer
Playing by the book:: Thank you!! How wonderful, I did stop by to check out your print-making, it's beautiful.
Jennifer:: Thank you for stopping by and taking the time to leave me such a wonderful note. I am glad the site is helpful.
awesome! really like your artworks!
ZuhaliZankhodir:: Thanks!
Post a Comment
<< Home