
Kids Art: Watercolors Valentine Hearts

Watercolor Cling wrap is a favorite project in our house - Ana and I do it on and off, for fun. Oggie is just now getting into it.
Rubber Cement masking is another fun project we enjoy.
Here, we combined rubber cement masking and waterclor cling/plastic wrap ideas to make sheets of colorful paper which we then cut into heart shape valentine cards.
The hardest part of this project is the wait: waiting for the rubber cement to dry and waiting for the watercolor to dry so the plastic sheet can be peeled off. We did these steps at night so we can set it for drying overnight which worked out well.
And we did the project about a fortnight ago - started out as just another Weekend Art Morning with Mama and then ended up as a Valentine Heart Cards Project.
Oggie enthusiastically did all the steps right from mixing the colors, to testing if it is finally dry so as to cut out the hearts.
If an eyebrow inadvertently raises on the heavy use of blues and greens rather than pinks and purples in this project, it is by Oggie's design, uninfluenced. No, no, nothing about 'boy' colors or 'girl' colors, no such stereotypes is encouraged... just that ever since he could communicate in his own way, he has been strongly attracted to blue, despite being offered other color choices.
And as of yesterday's tally, Og's first favorite color is blue, second is red, third is green, fourth is yellow... eightieth is grey, ..., hundredth favorite color is pink.
Heavyweight paper works best as it doesn't buckle much and holds paints well. Since cling wrap is tricky for small hands, I use just a regular plastic grocery bag. Save and reuse the plastic bag for art work of course, especially (and thankfully) since local grocery stores are not allowed to use plastic bags to bag the purchases for the customers.
I am digressing... back to the project.
Items Used:
- heavyweight paper - I use the 9"x12" watercolor paper (90 lb) or acrylic paper (110 lb)
- diluted tempera paint in various colors, or watercolors
- large paint brushes (preferably one for each color to keep the colors from getting muddy)
- a plastic grocery bag cut open to form a flat-ish sheet large enough to cover the 9"x12" paper
- optional: heart-shaped cookie cutter, pencil, scissors
Note: If using rubber cement masking, allow plenty of time for drying. Apply the rubber cement, allow to dry completely. Don't peel off the rubber cement. Use this paper with the dry rubber cement on for the watercolor cling/plastic wrap project as below.
- Get the paints ready: mix the colors as needed, dilute with water to a buttermilk-like consistency; preferably use a separate brush for each color; I limit the colors to 3 or 4 at a time for the 3 year old so as not to get it all muddy

- Pick up one color at a time and make blobs/blotches on the paper; Cut the 9"x12" paper to any size, if preferred; for the first trial with Og, I cut a 6"x6" square so a large canvas does not overwhelm him; try not to mix the colors on the paper, keep the color blobs separate
- Lay the plastic sheet on the still-wet paint and scrunch it up with the hands while pushing down on the heavyweight paper; the idea is to get the plastic bag to stick on, spread the paint blobs a bit, and also form patterns that will look stunning when dry :)
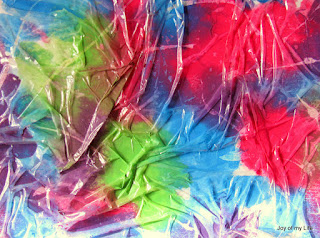
- Allow to dry undisturbed; we usually set it by the heating vent in winters and within an hour it is dry
- Peel off the plastic sheet when dry; test a corner first to see if it is ready to peel. then, remove the dry rubber cement mask to reveal the preserved whites (or layered colors) of the paper. Et violà!


Labels: arts and crafts, masking, valentine, waterclor-cling-wrap, watercolor
posted by Sheela
2 comments


